Application note: Connect NB | DEV KIT with Arduino
It is possible to communicate via the UART interface with the NB|DevKit and send user data to the cloud.
Therefore the jumper on the development board needs to be changed as mentioned in the hardware guide. The USB cable is still needed for providing power to the DevKit.
This application note uses an Arduino, but any other device with a UART interface (for example a Raspberry PI) can be used to communicate with the device. Only the logic voltage level has to be adjusted to 3.3 Volts.
Bill of Materials
For this application you need the following pieces:
- DHT11 temperature & humidity sensor
- Arduino Uno
- Vodafone Development Kit
- Exelonix Cloud Account
Steps
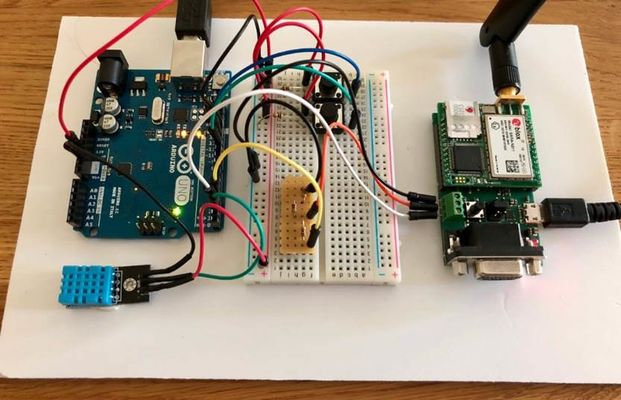
Connect DHT11 to Arduino
https://learn.adafruit.com/dht/overview
Connect Arduino to NB|DevKit
- Change jumper on NB|DevKit to use 3.3V UART interface
- Attach wires
 Add voltage divider to adapt Arduino 5V to 3.3V needed by NB|DevKit
Program Arduino
1. Read sensor values
2. Attach to NB-IoT network
Transmit/Receive the following EASY-Interface message to the DevKit via UART
EASY+Attach:0

// wait till attached to network:
EASY#Attach:Success
3. Transmit data to Exelonix cloud
Payload to be transmitted to Exelonix cloud in Exelonix UDP Protocol format: <IMEI>?b=[s="<payload>"]
Device IMEI can be read via message "EASY+Device"
Transmit/Receive the following EASY-Interface message to the DevKit via UART
EASY+TX:213.136.85.114,9876,<payload size>,<IMEI>?b=[s="temperature=12°C,humdity=45%"]
EASY#TX:Success
EASY~RX:<IpAddress>,<UdpPort>,<DataLength>,<Data>