...
Use windows executable from the Software & Drivers to install NB | EASY software.
The installer will take care of installing the Java environment and the required drivers.
Start the program via desktop shortcut or start menu entry.
Linux
Linux distributions provide separate packages for the Java 8 runtime environment and JavaFX.
Make sure you have installed all basic software requirements or the NB|EASY tool won’t start.
For example, to install Java 8 and JavaFX on Ubuntu you need to run:apt-get install openjdk-8-jdk openjfxThe required UART drivers are usually distributed as part of the Linux kernel since v4.4.132.
Check whether the required kernel module is loaded:
lsmod | grep option.Check whether you have read/write access to USB-UART bridge:
ls -la /dev/ttyUSB*.Download NB | EASY jar-file from Software & Drivers.
Start the program via command line:
java -jar Vodafone-NB-EASY-x.x.x.jar.
Linux setup & troubleshooting
...
The top area of the application shows the selected device and its current state. It contains the following information:
Device-specific parameters:
Name of selected NB-IoT device
Modem type number
Modem version, application version
IMEI: International mobile equipment identity.
Modem Status: shows the current status of the device.
Attach to network button: triggers an attach or detach depending on modem status.
Modem Status
The modem status indicates the following values:
...
In the detached state, the device is not able to transmit data to the NB-IoT network. First, an attach procedure needs to be triggered, including the following steps:
Select the NB-IoT network in the drop-down menu.
Click on the Attach to network button to start the attachment procedure to the selected NB-IoT network
Note: Be aware that the embedded SIM card requires either "Vodafone-global-roaming", a Vodafone Profile or a Vodafone partner profile, to be selected, otherwise the attach procedure will fail.
...
In the attached state, the device is now able to transmit data to the NB-IoT network by the following control elements:
Text field button: to enter text to be transmitted when button (2) is pressed.
Transmit to Cloud button: to start transmission to the cloud of the entered text (1) as well as the current cell information.
Update button (3): to start a cell information update.
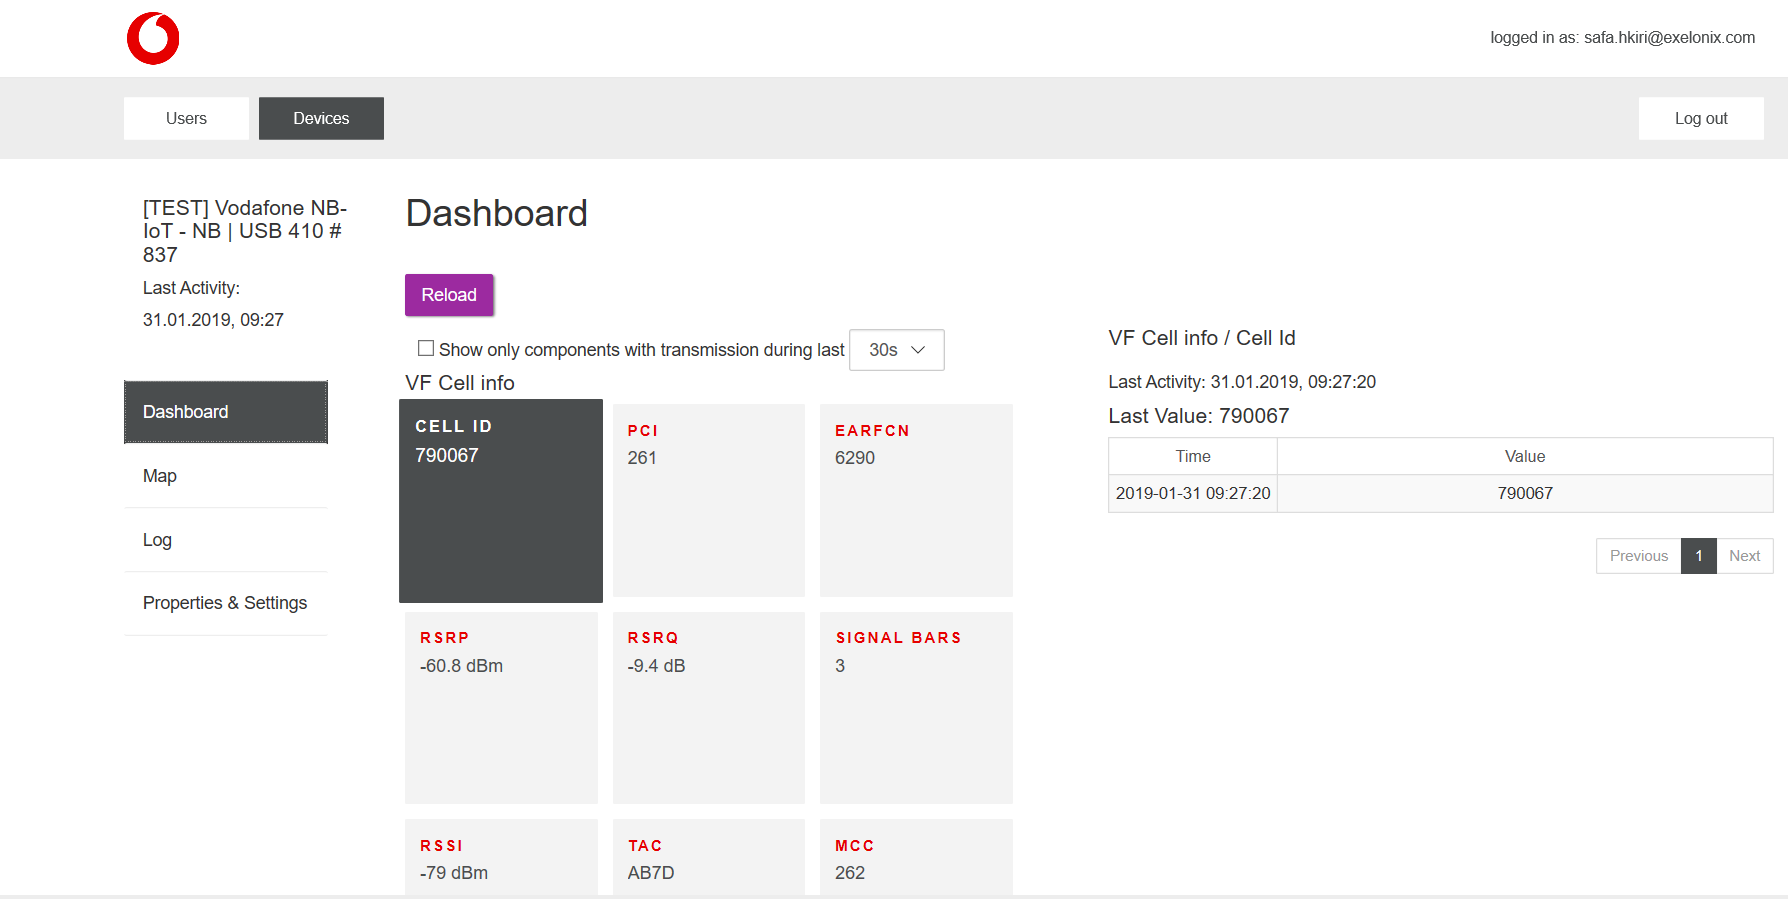
Cell information list (4): which shows all received cell information of the last successful cell information update (see Displayed parameters in Table below).
Open IoT Manager button (5): to open IoT Manager website to view all successfully transmitted values as described in figure 6.
...
Control Center
The control centre is a more advanced and detailed view of the communication between the NB|EASY tool with the connected IOT device.
Here, the user can send individual messages to the device. The incoming messages are monitored as well.
Switch between "AT" and "Easy" mode (The USB connect LPWA does only support the "AT" mode)
Message log: tracks all messages.
Button to clear the message log (2)
Button to save the current message log in a text file.
List of all possible AT commands
Select a single AT command to be sent to the device. The message string will be copied to the message text field (8).
Button to start sending the AT command (8) to the device.
Message text field. The message to be sent to the device can be edited further.
...
Automatic TX mode
This section allows setting automatic data transmission events. The event interval period is configurable.
...